Contents
1 Starting Wind River Workbench
To start Wind River Workbench IDE (Integrated Development Environment) select from menu Applications menu → Development → Wind River Workbench or run /opt/WindRiver/workbench-4/startWorkbench.sh from command line. The following window will show up asking us to choose the workspace.
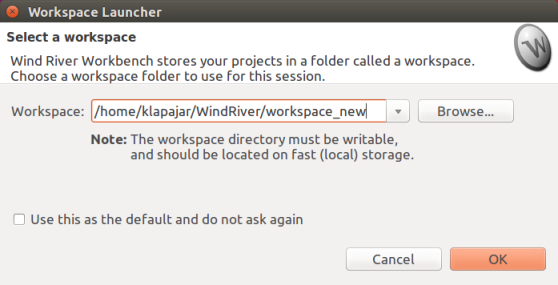
The workspace is the place, where your projects will be stored. It is recommended to place workspace under your home directory (/home.nfs/<login> in the lab).
2 New Project
To create a new project choose File → New → Project and choose VxWorks → VxWorks Downloadable Kernel Module Project. (Later, you will also work with Real-Time Process Projects.) A dialog window opens, where you specify a Project name and optionally, you can change the location of the project. Continue with the Next button.
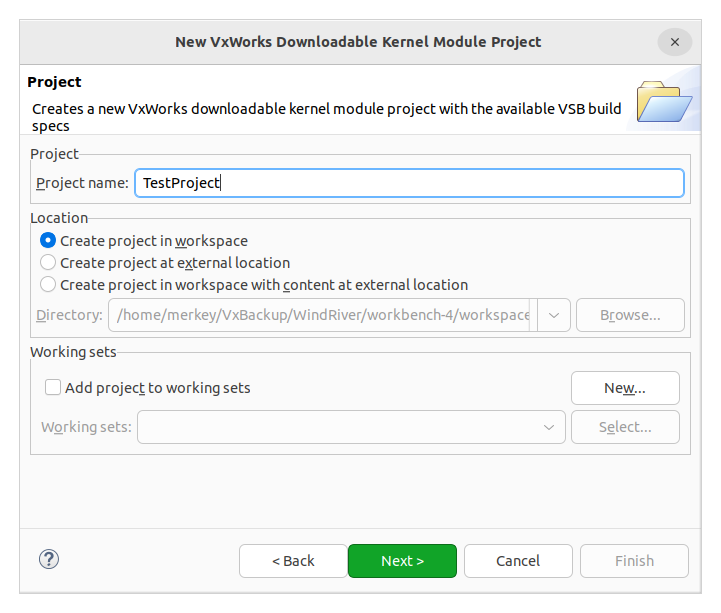
In the next window, choose what our project will be based on. Since we are going to run the program in a simulator, choose the image project and vip_vxsim_linux_llvm (prebuilt). Then click Finish.

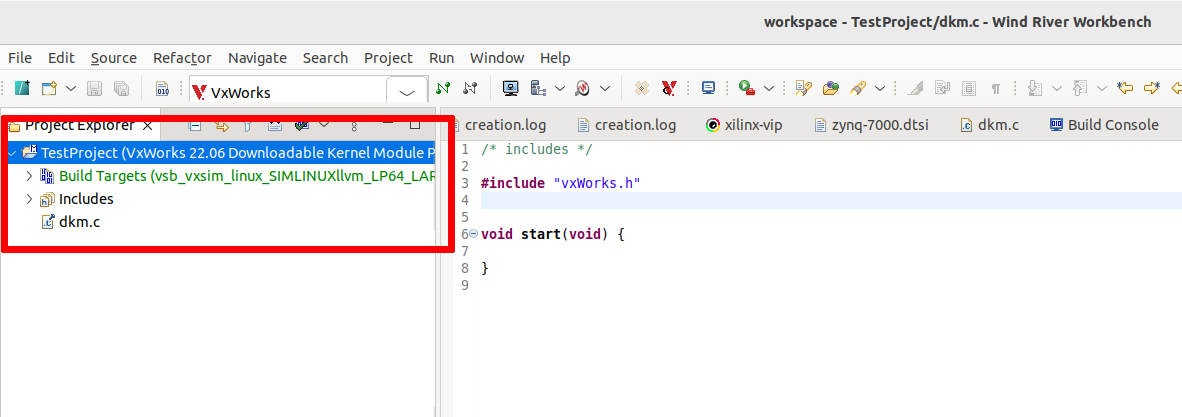
Now you can see the newly created project in the Project Explorer tab. The project contains a simple C code template dkm.c.
2.1 Example code
Replace the code in dkm.c with the code below:
#include <taskLib.h>
#include <stdio.h>
#include <kernelLib.h>

int task_run[] = {100, 450, 200};
int task_stop[] = {18, 25, 30};

void task(int n)
{
        long int x;

        printf("Task %i has been started\n", n);

        while (1)
        {
                printf("task %d: running\n", n);
                x = 1000000 * task_run[n];
                while (x > 0) x--;
                printf("task %d: delayed\n", n);
                taskDelay(task_stop[n]);
        }
}

void CreateTasks(void)
{
        TASK_ID id1, id2, id3;

        /*  kernelTimeSlice(1); */

        cpuset_t affinity;
        CPUSET_ZERO(affinity);
        CPUSET_SET(affinity, 0);
        taskCpuAffinitySet(taskIdSelf(), affinity);

        id1 = taskSpawn("Task0", 210, 0, 4096, (FUNCPTR) task, 0, 0, 0, 0, 0, 0, 0, 0, 0, 0);
        id2 = taskSpawn("Task1", 210, 0, 4096, (FUNCPTR) task, 1, 0, 0, 0, 0, 0, 0, 0, 0, 0);
        id3 = taskSpawn("Task2", 210, 0, 4096, (FUNCPTR) task, 2, 0, 0, 0, 0, 0, 0, 0, 0, 0);
}
3 Building the application
As with most modern IDEs it is possible to build and run an application with a single click. It is, however, quite useful to understand what happens behind the scene. We will first look at the individual steps that are needed to run a VxWorks application and then we will show how to do it with one click.
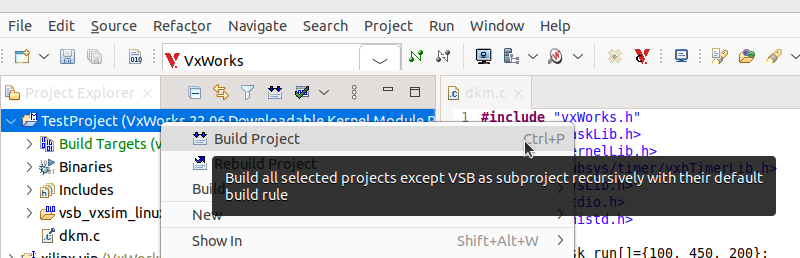
To build the project, right-click the Test project header and choose Build (or press Ctrl-B, Ctrl-P).
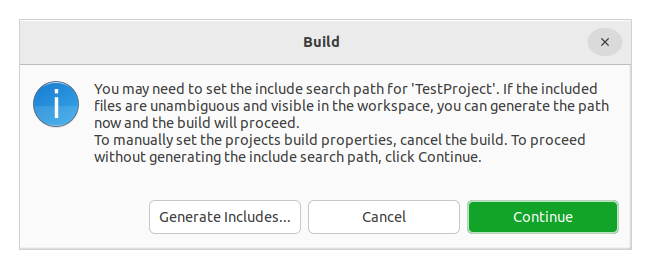
The first build asks for extension of search path. In here, you can proceed with Continue.
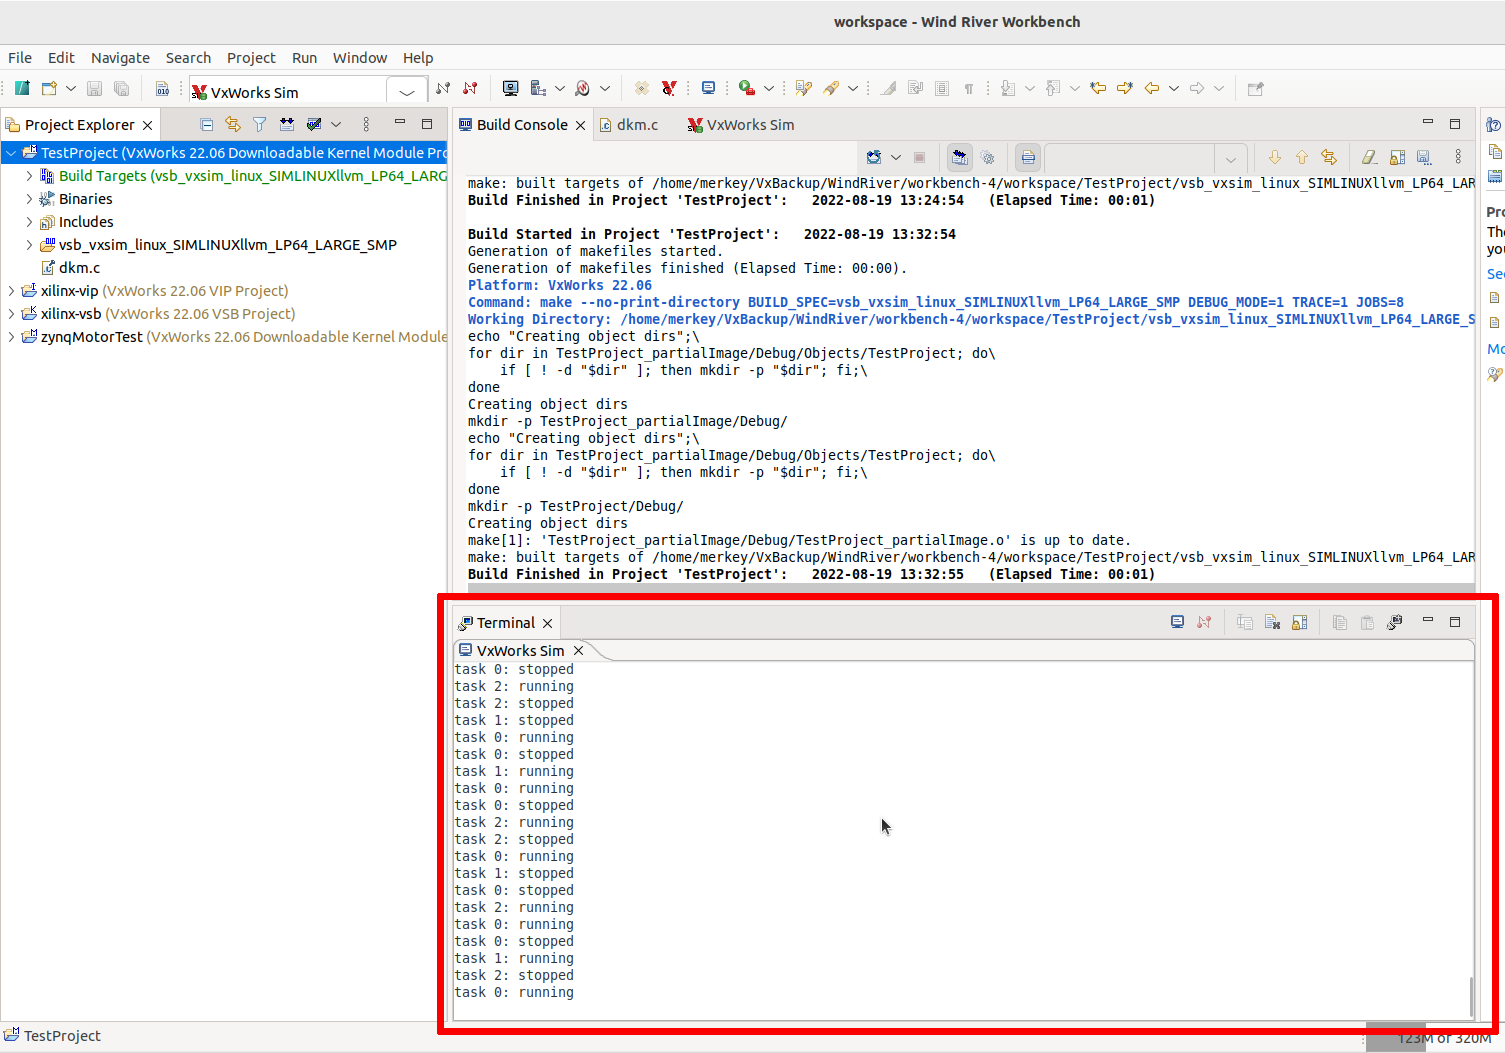
The Build Console opens automatically and shows the output of the build process:
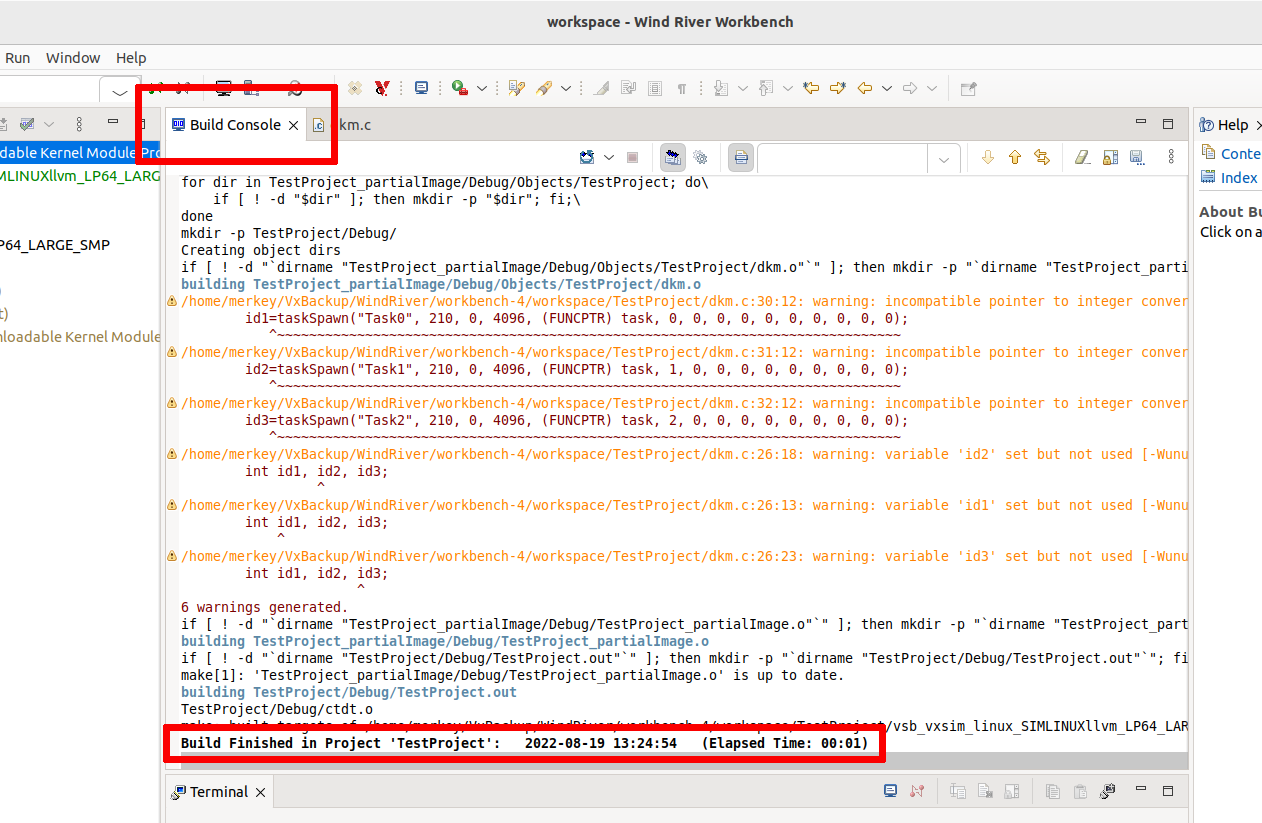
If you see Build Finished in black color, build was successfully. Otherwise, you have to correct the reported errors (and warnings).
4 Starting the simulator
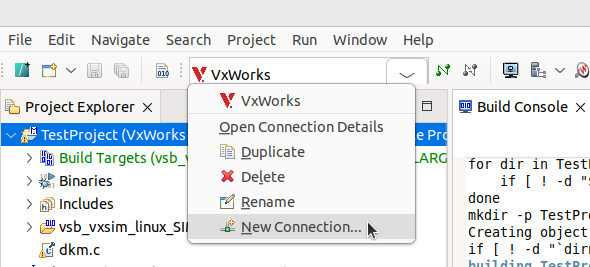
As we will run the program in the simulator, we have to set it up first (if not already done). From the Workbench tool bar, select New Connection from the drop-down list:
In the New Connection dialog, enter a Connection Name and select:
- Target Type: VxWorks Simulator
- Connection Mode: Application Mode
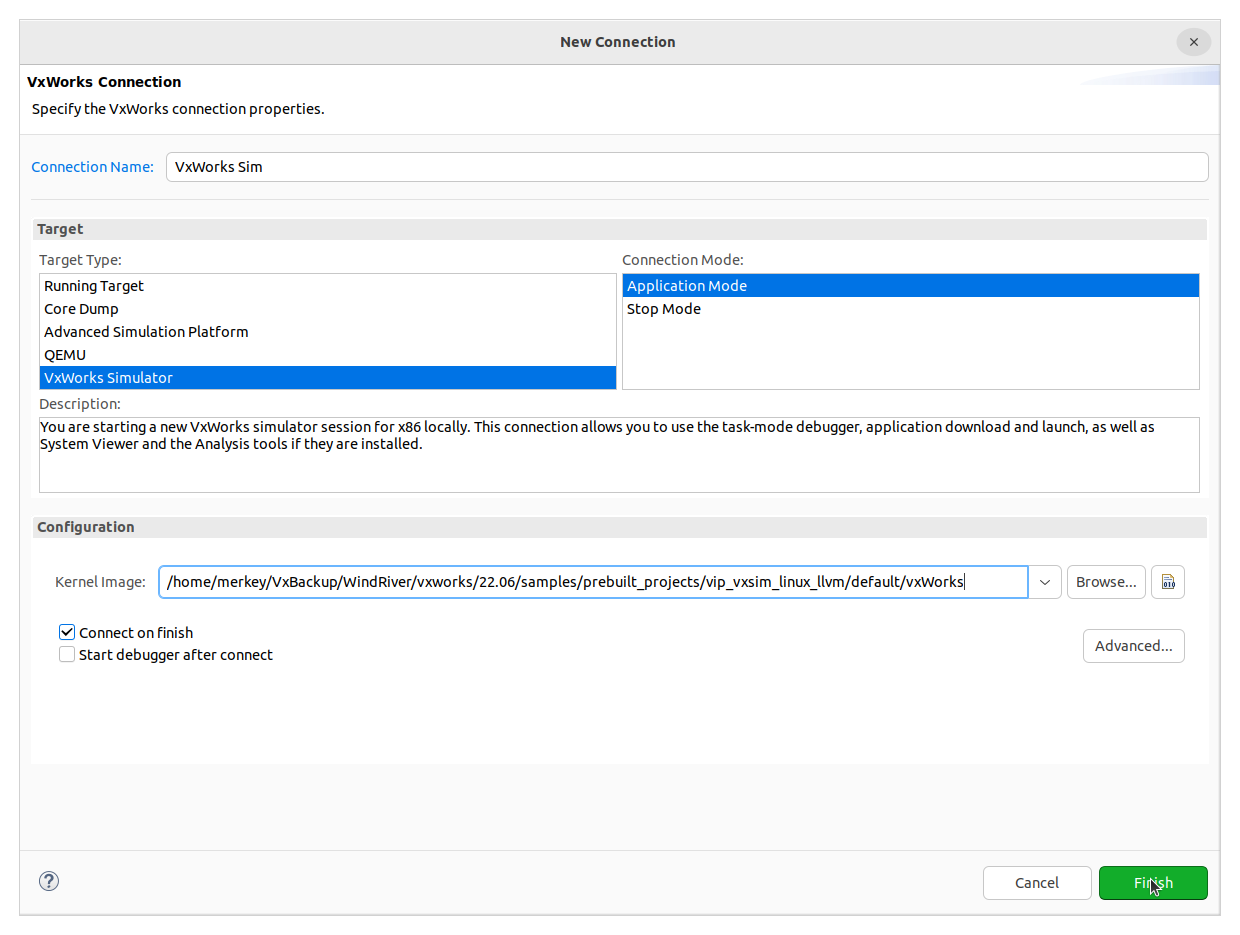
Select Finish and the simulator will be started. Two new tabs will open:
- Simulator tab showing Connection details.
- Terminal tab showing the console of the simulated system.
Try to enter the command i to the VxWorks shell prompt in the console:
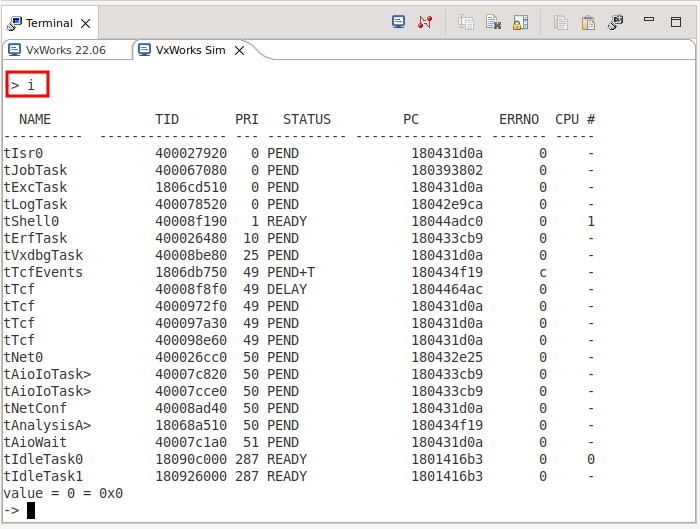
This command prints all running tasks in the system.
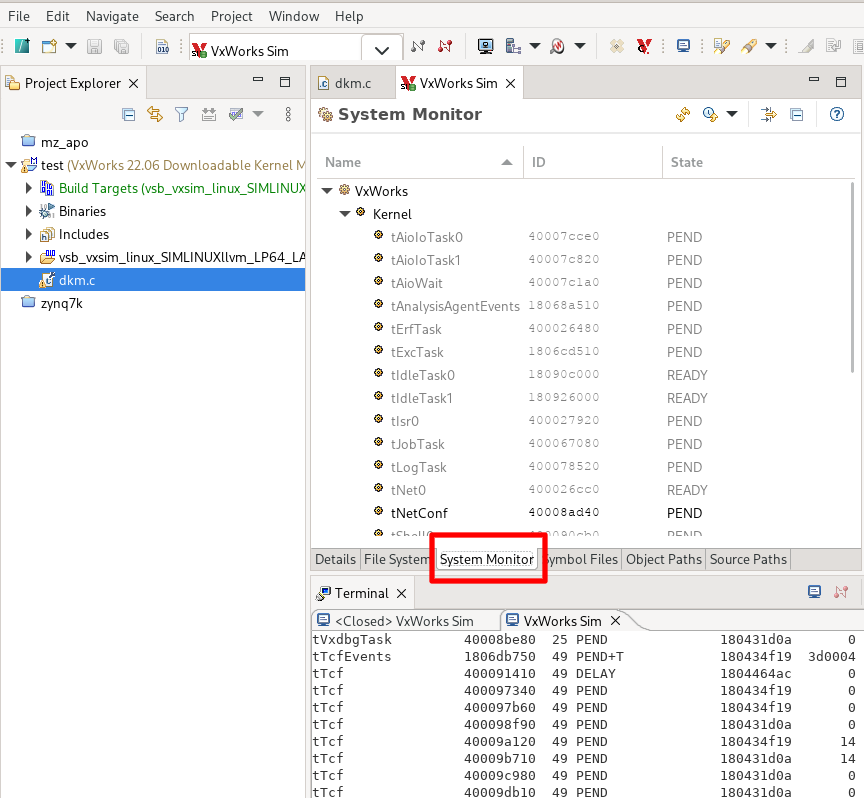
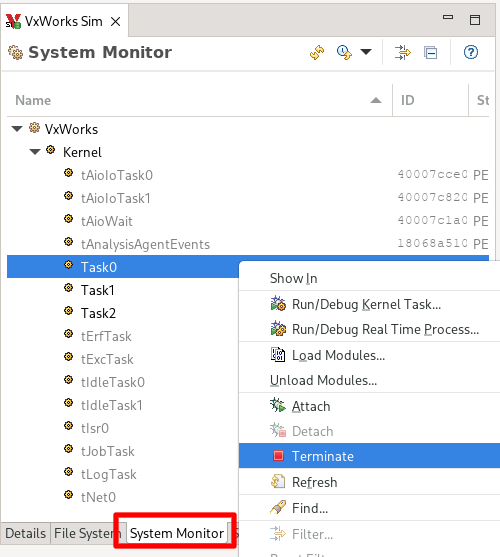
Similar information can be obtained from the System Monitor tab:
5 Running the application
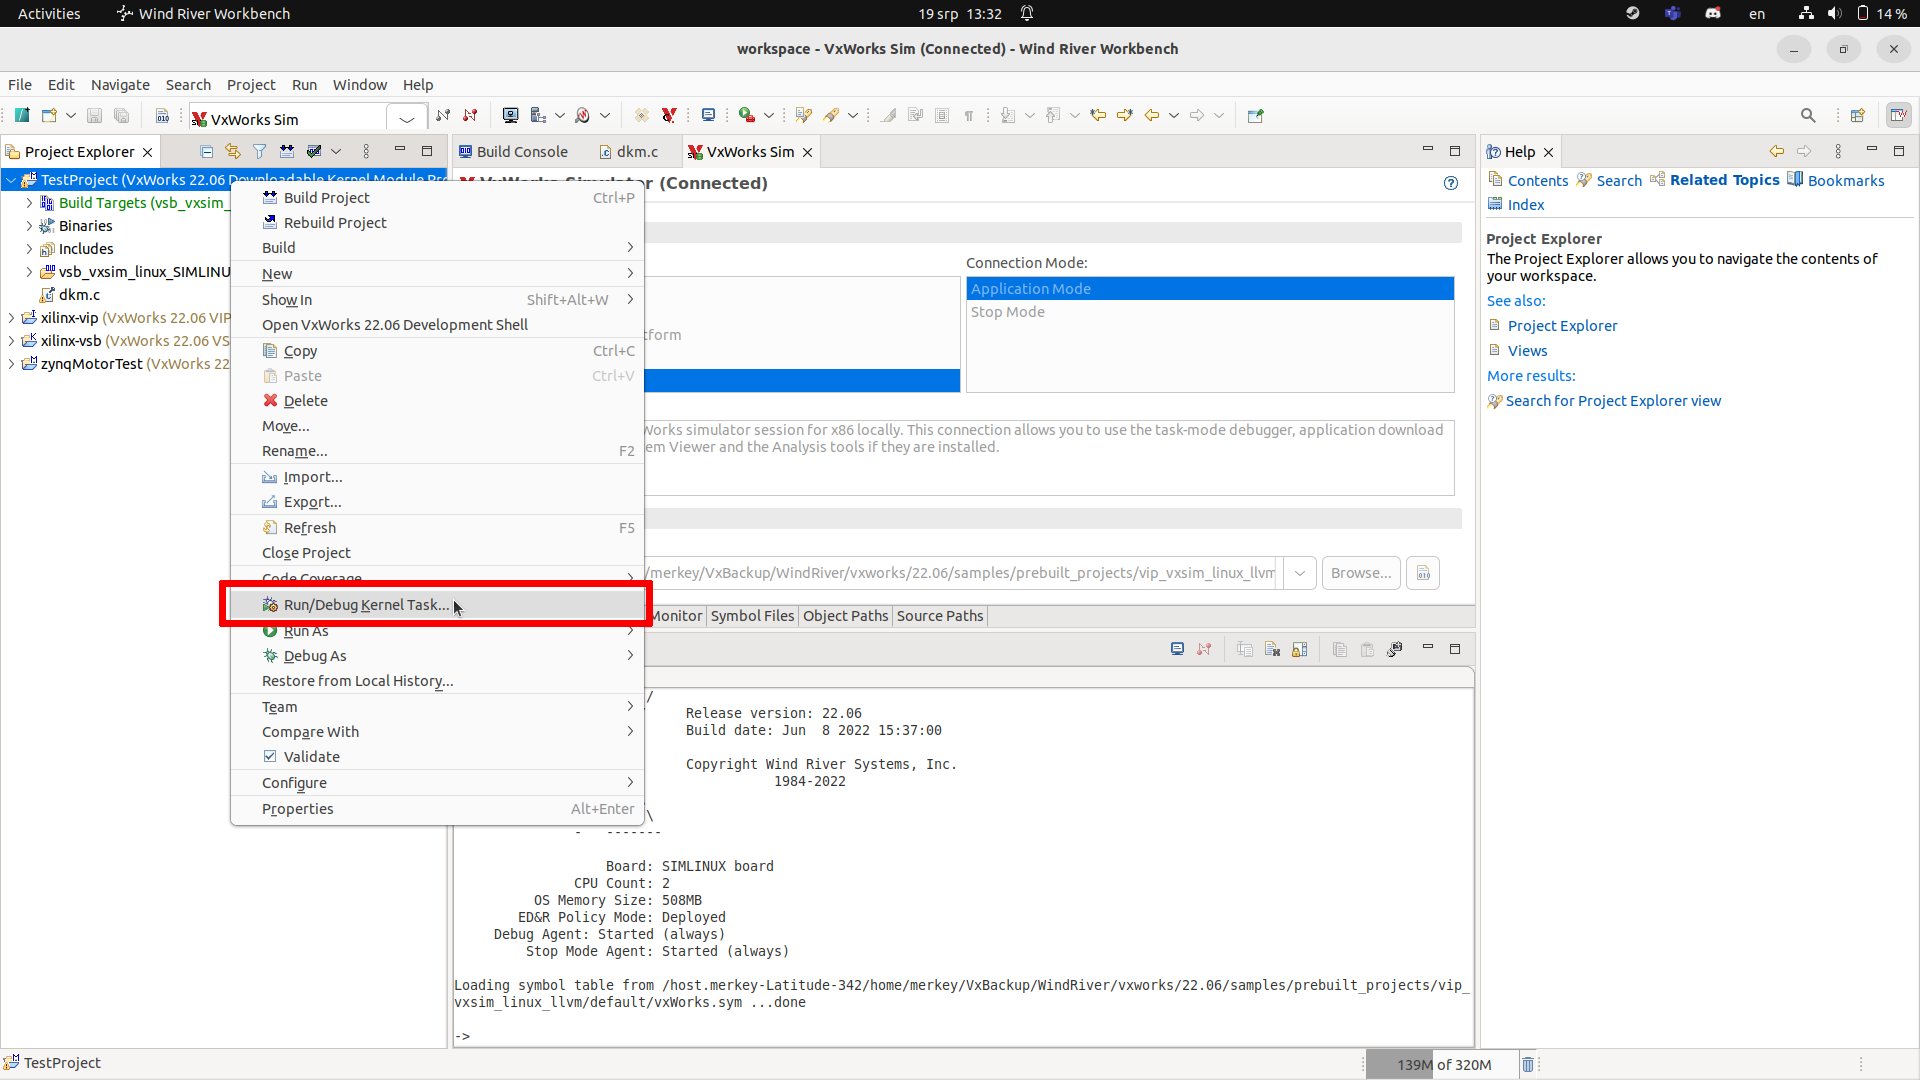
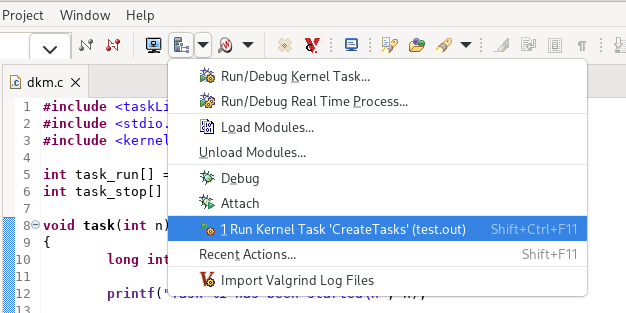
Now run the program by right-clicking the project and selecting Run/Debug Kernel Task....
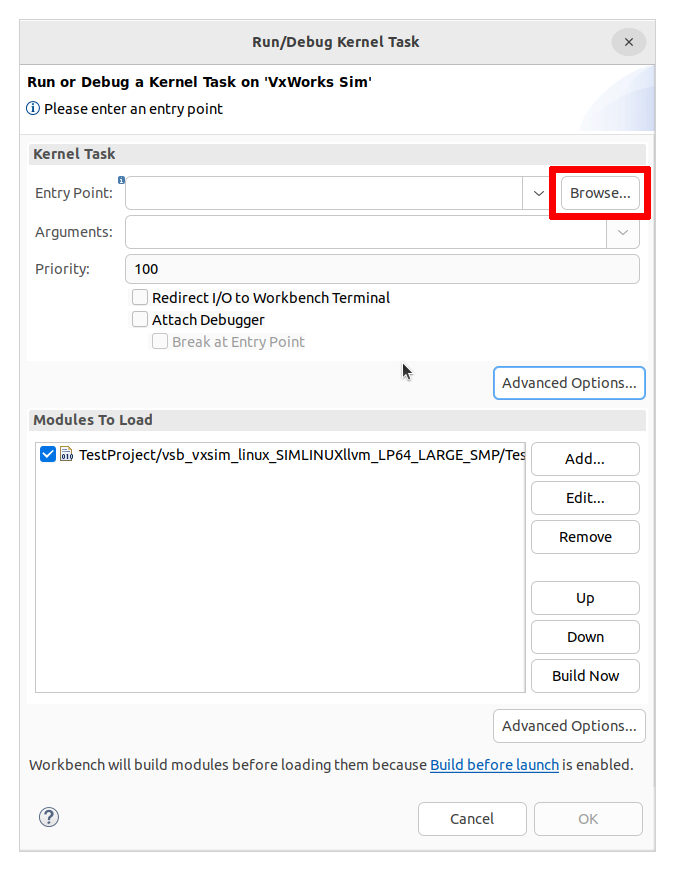
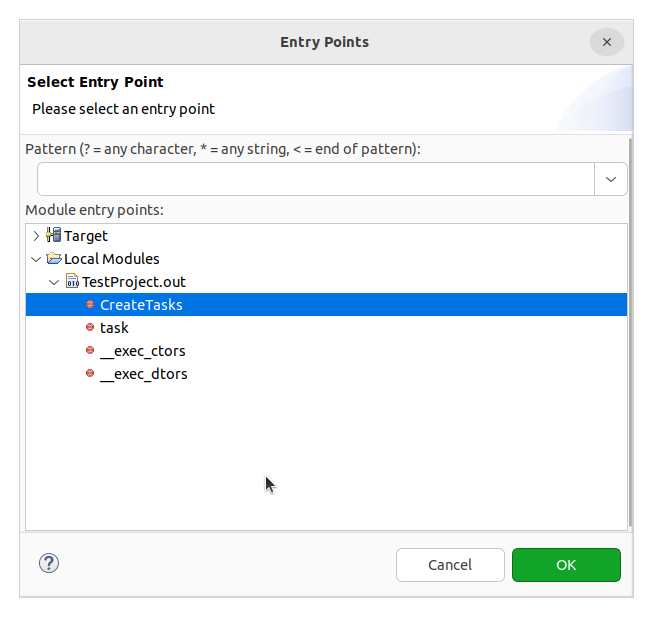
In the Run Kernel Task dialog, specify the Entry Point, which is a name of the function to run. Enter CreateTasks or select it via the Browse... button.
Select CreateTasks from the available entry points:
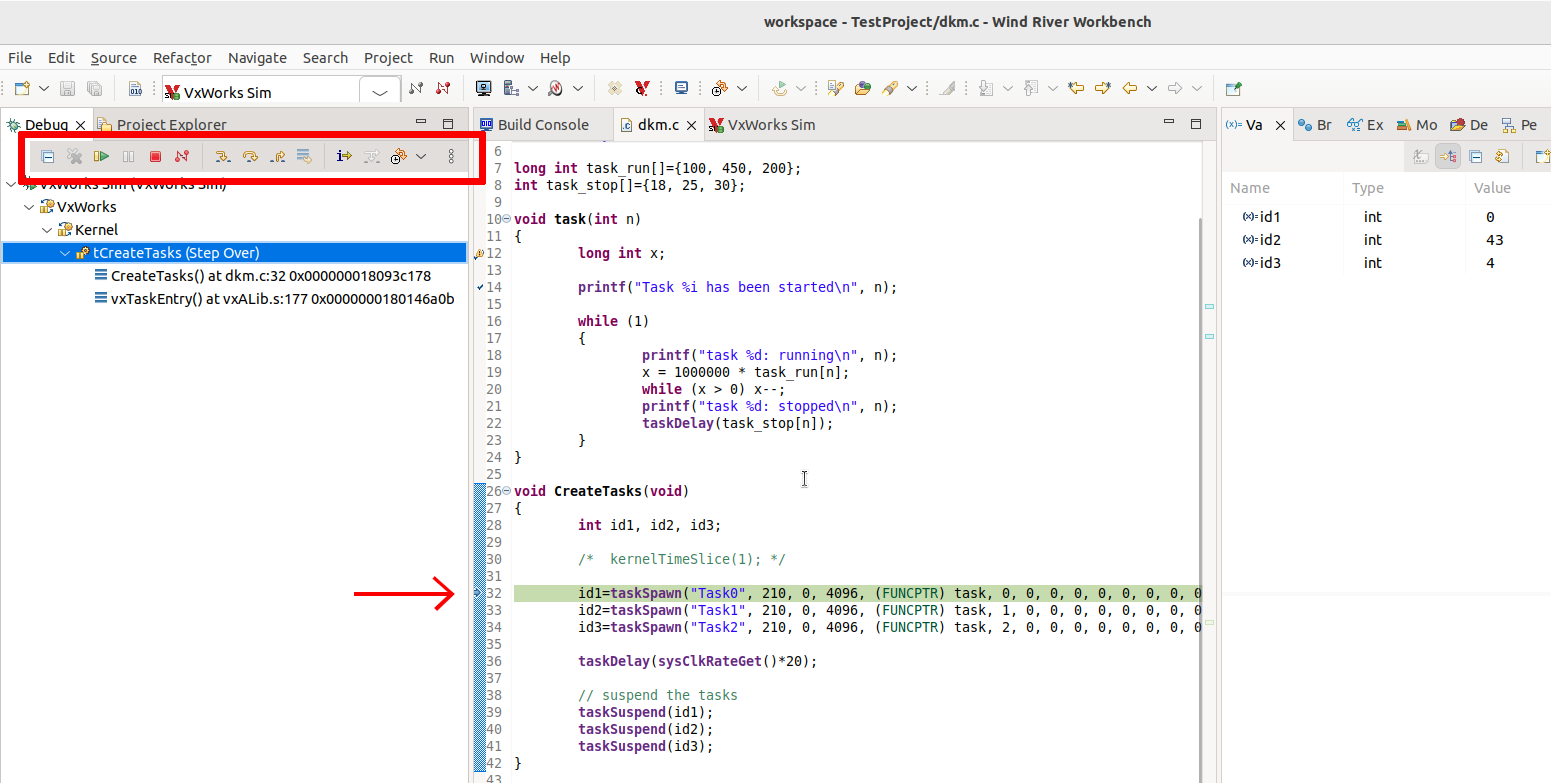
After pressing OK, the application is run in the simulator and its output will appear in the Terminal tab.
If you want to run the application again, it's sufficient to press Ctrl-Shift-F11 or select Run Kernel Task from Target actions menu:
6 Stopping the application
There are several ways, how to stop the application:
Stopping the whole simulator with red N icon.
Terminating individual application tasks from the System Monitor tab via right-click menu.
7 Debugging
To debug an application, select the Attach Debugger option when running it:
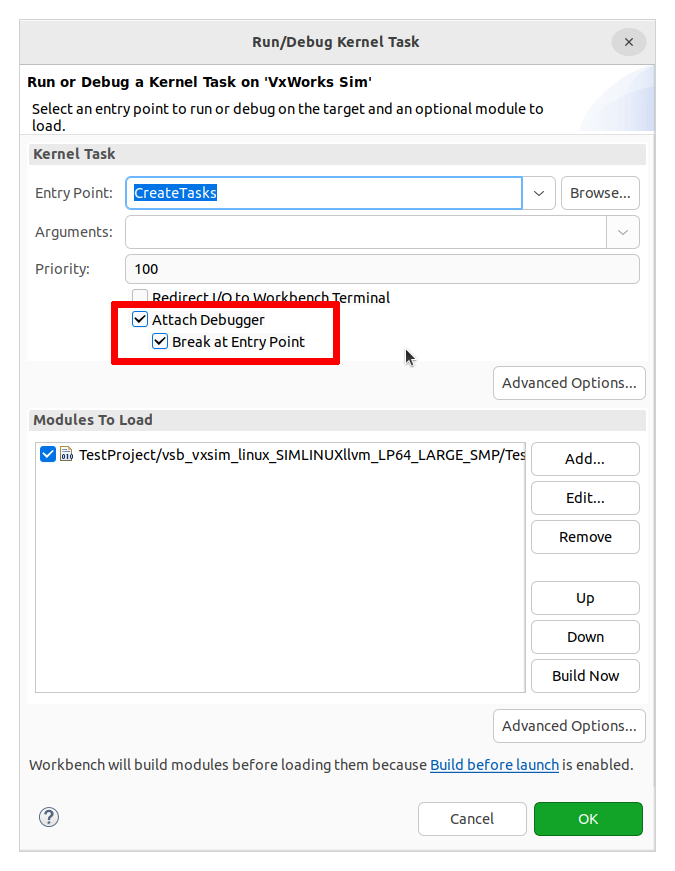
The Workbench stops the program at the entry point or any other manually added breakpoint. Now you can step through the code similarly to other IDEs.
8 Help and Documentation
There are two basic types of documentation available:
- reference manuals
- guides, tutorials
Guide documents are available as PDFs in /opt/WindRiver/vxworks/22.06/docs. The most important document for you will be Kernel_Application_Development/VxWorks_Application_Programmer_s_Guide__22.06.pdf.
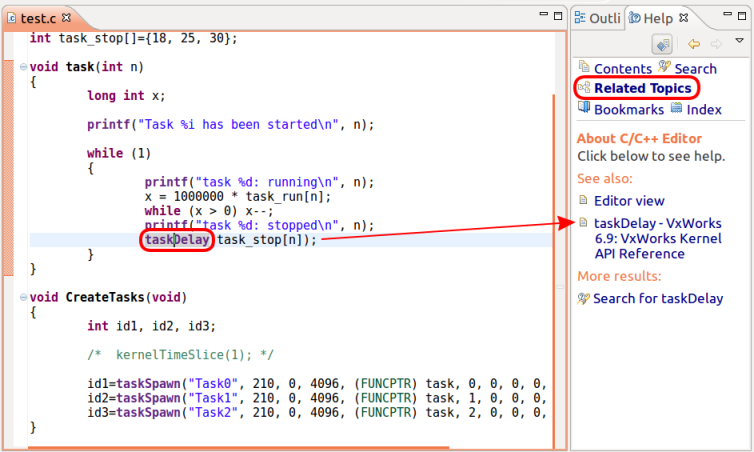
Reference manuals can be accessed in the IDE itself via Help→Show Context Help. The help window will then show links to documentation related to the position of the cursor in the editor.
9 System Viewer
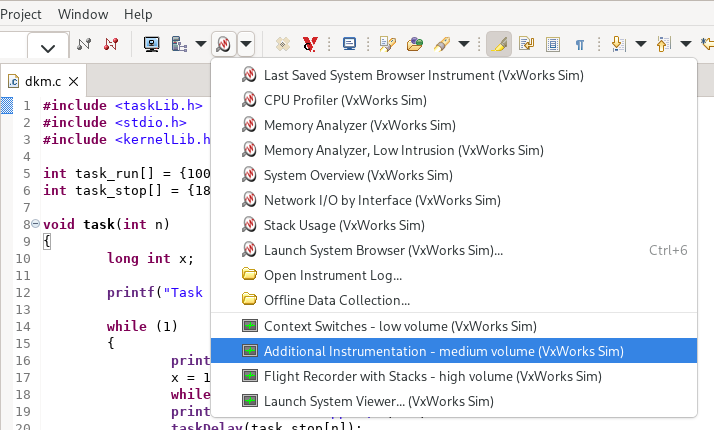
System Viewer is a tool that can record a trace of system activity and then display it in a graphical way.
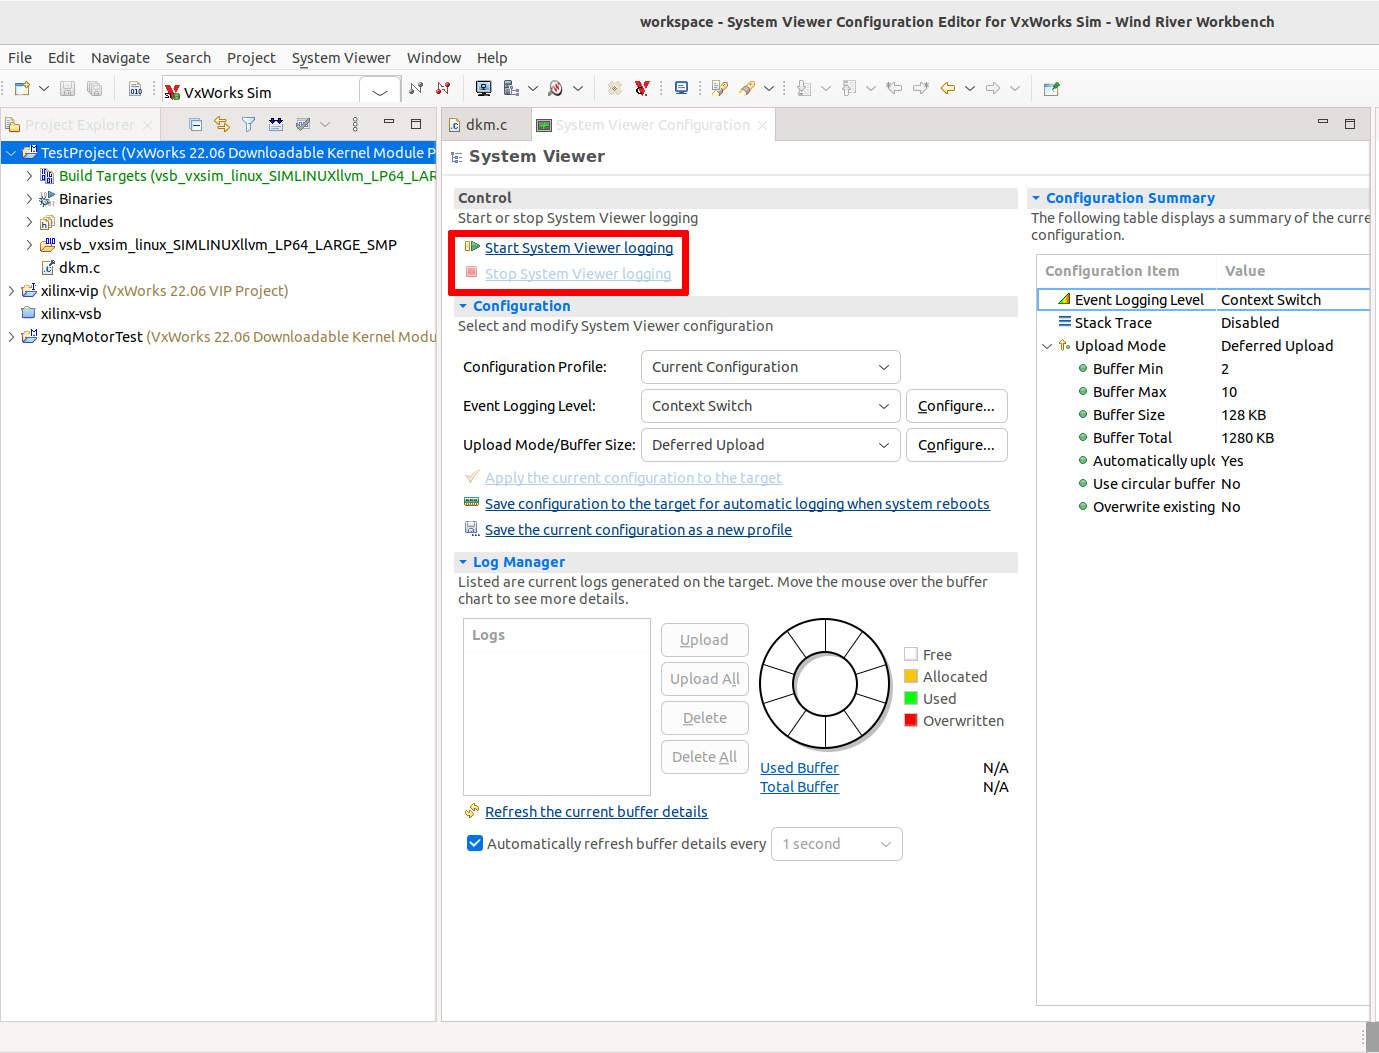
System Viewer can be configured to record different amount of information. We will choose the middle ground by selecting Additional Instrumentation as shown below:
You can now start recording the trace from the running system:
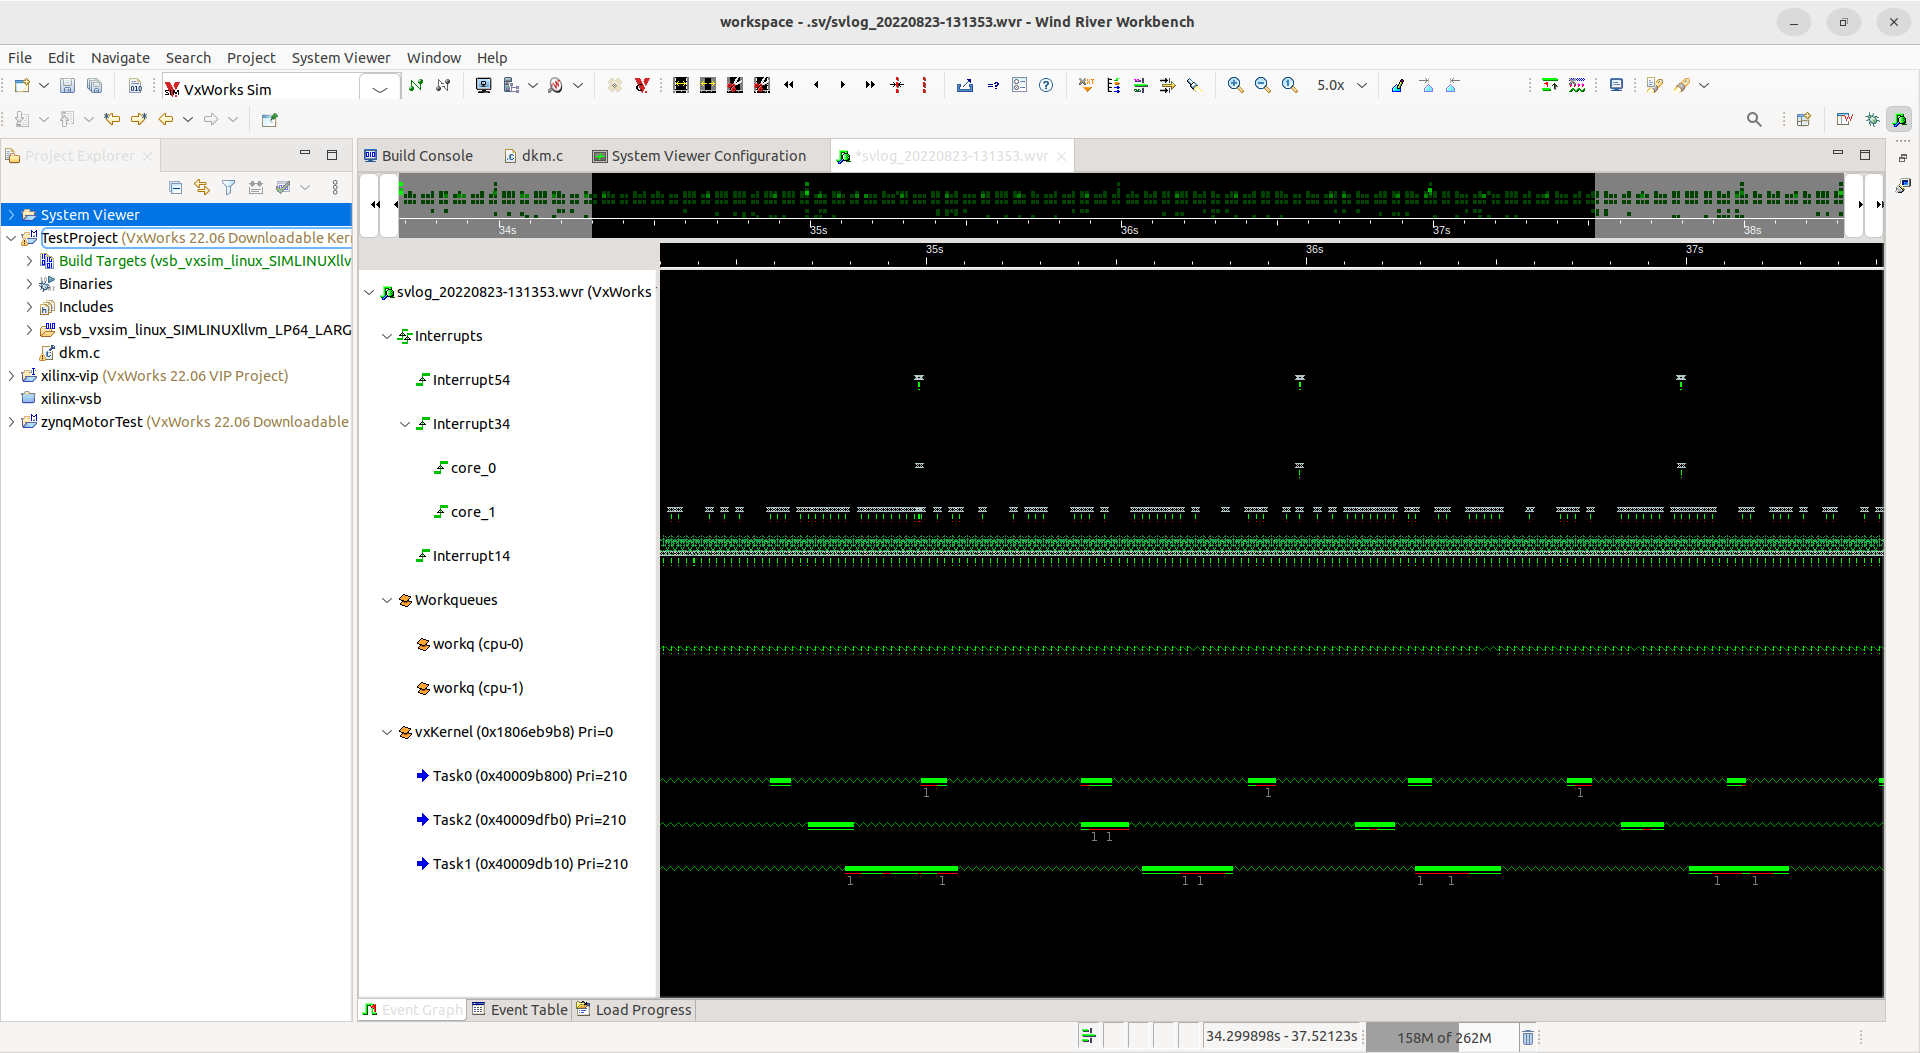
After stopping the recording, a new window with the recorded data appears.
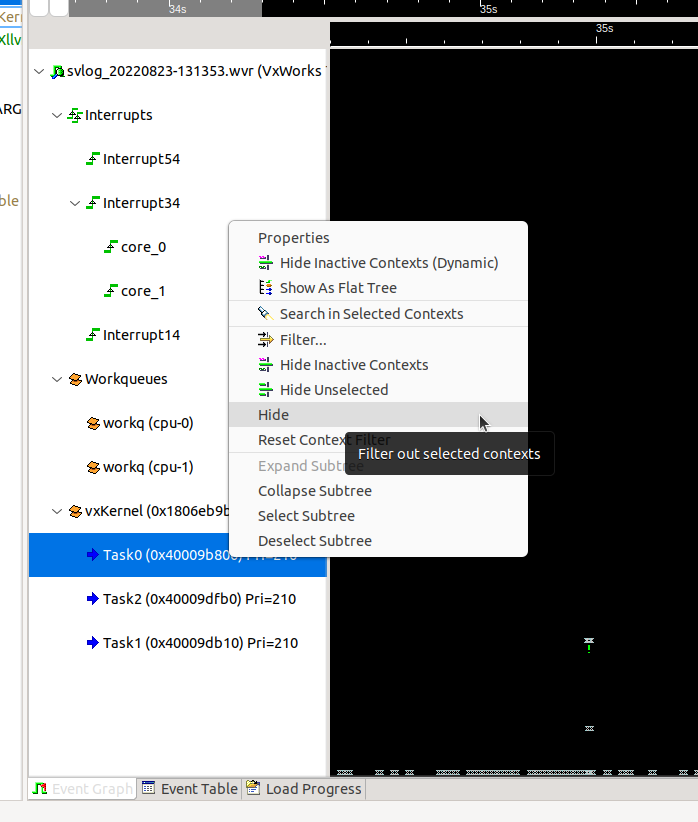
You can also hide any tasks from the view:
10 Assignment
Use the System Viewer tool to compare the behavior of your program
when kernelTimeSlice(1) is commented out and when it is not.
Look up kernelTimeSlice documentation and compare the
documentation with the observed behavior. Explain to the teacher what the
kernelTimeSlice function does and show him the system viewer
traces (both with and without kernelTimeSlice).
10.1 BRUTE instructions
Upload a ZIP file with this content:
- Image of the System Viewer with the kernelTimeSlice disabled.
- Image of the System Viewer with the kernelTimeSlice enabled.
- Text file with a few sentences explaning what does the function do, and with a short explanation of its only argument.
